Friday 28 August 2015

"Create, Live, Learn" Canvas - 7 Dots Studio
Domestic Goddess Collection


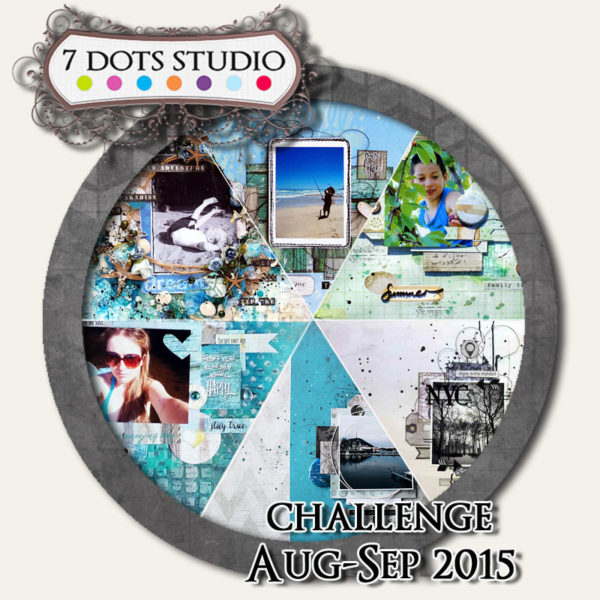
It's round!  Isn't that fun?!?  Finally I found a circular canvas & thought I would 
give it a go!!  This was a lot of fun for me!  I was trying to create in the 
style of Finnabair, but I definitely have to practice some more LOL.  


I used the beautiful “Domestic Goddess” Collection.  I am loving re-using 
this collection at the moment!  It is so classic & elegant.  See it HERE.  
You can also see this post up on the 7 Dots Studio blog HERE.


I had a lot of fun with mists & sprays, microbeads, metals, etc but of course the
 “stars”of the show are the tags from the Domestic Goddess Collection HERE.  


They are the only 7 Dots Studio product I have used on the canvas but I have 
used many of them – 12 altogether – one dozen – & I simply LOVE the look 
of them all layered up together. The colours, sentiments & illustrations are great!


I inked up all the edges of the tags using my bronze Tsukineko inkpad
& I sprayed my entire piece with the clear spray paint in my first {main}
image – which works wonderfully to seal the canvas, keep all the elements
 in place, & also hold every tiny micro-bead exactly where I placed each one.


So you see…there is always something you can do with your 7 Dots Studio
Stash – even if you have only one sheet!  Every page is so versatile!!


What a beautiful collection don't you think?  The colours are so warm & inviting!!


I hope that I have inspired you to try something different today!
To not be afraid of doing something “outside of your comfort zone”
But to play & experiment with your 7 Dots Papers! 
Have you tried out a round/circular canvas yet?! 


Wednesday 26 August 2015

''Be Kind" Canvas Tutorial for 7 Dots Studio
Using Dreamer, Soulmates & Illumination Collections


           Hi again everyone!  Welcome back to my tutorial based on the project I shared here
                     & on the 7 Dots Studio blog HERE yesterday - a mixed media canvas.  


Please see the text typed on each photo collage for instructions :)


I would love to hear what you think so please let me know!  Is this the same way you do it?!


You can see my tutorial up on the 7 Dots Studio blog too HERE.


I love spraying on LOTS of mist & drying it off to form drips!


I'm crazy about archival inks at the moment!  These Splash inks are great!!


Hands up who loves opaque white mist?!?


I love this glue!!  It's not cheap but it lasts a looooong time.  Can you get it where you live?


The can below is clear spray paint!  I've never seen it before until I purchased this can recently!!  It's brilliant & seals off-the-page projects with a wonderful sheen...


Thanks for stopping by today!
I hope you enjoyed my tutorial!!


Tuesday 25 August 2015

"Be Kind" Mixed Media Canvas - 7 Dots Studio
Step-by-Step Photo Tutorial


Hi everyone!  Today I am back with a project for 7 Dots Studio.
This month I made a canvas for my tutorial project.  I will be back
 tomorrow to share the tutorial so as not to make a REALLY long post!


I used 3 different 7 Dots Studio Collections for this project.
"Dreamer" - papers
 ''Soulmates" - stencil
"Illumination" - words & sentiments
I remember the first time I made a canvas I was so frightened!
I saw them on-line & they looked so detailed – I was not sure where to start!! 
 So perhaps you have the same problem?  Let me show you mine…
{ & tomorrow how I put it together!}


Before I explain my process to you let’s take a look at all the details.
I have used an inspirational quote as well as quite a lot of embellishments.


The pattern papers I have used come from the Dreamer Collection HERE.
There are 4 different designs left in stock & I have used all of them!


Those wonderful white hearts on the black base, & the matching words,
all come from the Illumination Collection HERE.  They are so versatile
& match every other 7 Dots Studio Collection so I use them all the time!


They come as a 6 x 12 inch sheet of pop out elements HERE.


To co-ordinate with the beautiful papers & elements from 7 Dots Studio
I have used all sorts of other embellishments.  Flowers, chipboard, etc, etc.


I have also added many different textures using mixed media.
My background uses the Soulmates Squares Mask HERE.  


 I made the 7 Dots Papers & elements the main feature of my canvas
by using them all in and around the central area with my photo.
I hope you like my canvas & that you come back tomorrow
to see how it all came together!!  Bye for now :)


Monday 24 August 2015

"We Had Such A Blast" Class Page
For Mixed Media & Layering Newbies :)


Oh the joys of trying to photograph a double layout then fit it into a blog post!
Clearly I need more experience with this format!!
Anyway HELLO!!!

Before you rush away, thinking you must be on the wrong blog - let me explain :)


A few weeks back I was invited to teach at a store in my state - not too close to
where I live but still doable & I like to get out & about & explore the area!


This was my spec:-  My layout needed to be - 

1)  A double pager that could fit quite a few photos 
(that's the most popular format in South Africa)

2)  Including mixed media but for experienced scrapbookers totally NEW
 to mixed media {Hence the "Mixed Media LITE" look to this page}

3)  Very Budget Friendly


So I put together some kits with economical elements such as cardstock,
 an interesting selection of Studio Calico papers {that would suit 
all themes & be neither masculine or feminine}.


The mixed media aspect taught:-

 1) Spattering with sparkling pigment powders
2)  The difference between chalk & archival inks & free stamping
 {not using an acrylic block}
3.  Embossing {they thought that was MAGIC!!!}


I tried to introduce the ladies to my style of scrapbooking {which is very different 
to the traditional, local style here - which has oversized elements, not a lot
 of white space & very little layering}, through some "lite" layering, some
 stapling with some pretty gold staples & some texture with some
 Prima Holey ribbon & some dry wall tape.


I also taught them a speedy method of painting chipboard
 & introduced them to the joy of glitter varnish!


They seemed to enjoy it very much & the store owner was very happy & has invited me 
back to do another class in a couple of weeks!  It really is fun seeing everyone working
 in a different way to their usual "Modus Operandi" & being amazed by products they 
have never seen or heard of before but what I love the most is encouraging
 people to create their OWN way, make their photos fit & not produce a 
"colour by numbers" page that looks identical to everyone else's. 

 The outcomes were all unique! YAY!!


Saturday 22 August 2015

True Story Layout - 7 Dots Studio "Vacation" Challenge
Aug/Sep 2015 - Illumination/Nature Walk Collections


Hello everyone!  HAPPY weekend!!  Time for a new challenge over at 7 Dots Studio for August/September - see it HERE - you have until the 20th of September to play along. 

The theme is VACATION so all you need to do is create any project using any 
amount of 7 Dots product {even just one sticker!} along the theme of vacation/s.


Most of the team showed layouts of exotic locations & lovely Summer sun but, as you know,
living here in South Africa {in Durban, where the motto for the city is "the warmest place
 in South Africa"} sunny days are the norm, rather than the exception, so I don't get excited
 about them!  I actually enjoy a dreary, cooler day as they come around so seldom!


So instead, I created a layout about a weekend my son & I went to the Mother City 
{Cape Town} to watch Eminem in concert.  Both of us are huge Eminem fans 
{him due to me!} & it was my birthday present from my family last year :)  

We had a really amazing time & it was a very special
vacation for me, even though it only lasted a few days!


I used 7 Dots Studio Illumination Collection for the background paper, sentiment cards
 & stamp & the Nature Walk Collection & Destination Unknown for the embellishments.

 Just like Prima, 7 Dots Studio Collections all integrate with one another,
 making mixing & matching a piece of cake!


I kept all the ephemera from the concert so added my original air ticket as well 
as the concert ticket to my page.  When creating this page I was imagining 
a travel wallet with all the contents spilling out!


I was really happy with the way this page turned out for me.  It is such a unique experience going to a music concert.  I haven't been to many in my life but have been blessed enough to attend a U2 concert as well as an REM one & both of them were AMAZING!  Eminem was absolutely incredible in real life.  So commanding of the stage & such a big voice 
& so much conviction.  What an experience!

I hope you will join the challenge. 
 There is always an amazing prize for the voted winner!
ENJOY YOUR WEEKEND!!


Thursday 20 August 2015

Real Life Scrapbooking Classes & Workshops
Around Durban - Keeping me Busy!


I have been scrapbooking now for 12 years.  A LOT for many of those years too.  
However, I never thought I would enjoy teaching.  I have written & recorded
 many an article & tutorial but only FINALLY got started with real-life it this
 year, due to the insistence of someone who was desperate to have me
teach them & encouraged me to get up & running.


Starting teaching involved a lot of set-up work for me to be able to begin. I needed to
 convert our dining room into a space suitable for teaching, which required covering
 our large dining-room table with glass to protect it as well as buying & refurbishing 
 a couple of large "storage monster" units/cabinets to hold class stash & "for sale" 
products, as I needed to keep these separate from my own personal & DT stash.


The way things work here in South Africa is that the LSS {Little/Local Scrapbook
 Store} is owner run & the owner herself teaches the classes.  As there is not
a huge clientele this is a cost effective way of doing business,so teaching from
home was the only viable way for me to begin.  Well the surprise came in that
I ABSOLUTELY LOVE TO TEACH!  I decided to be adventurous & give it a go,
simply because it was something I hadn't done before, & EVERYONE always
asks me if I teach, so I thought I should try it out to see what it was like!


I now have weekly lessons at my home & recently was also invited to teach
a local workshop about an hour away from where I live, which was even
MORE fun due to having a lot more SPACE!  So it just goes to show
that you really need to try things out before writing them off as
"not for me" which is what I did in the past, when it came to teaching.


Now I only hope that I have plenty more teaching opportunities in my future :)


Tuesday 18 August 2015

Collage Notebook - Studio 75 - Splash it! Collection


Hi everyone! Today I have another notebook cover to share with you using 
the Splash it! Papers from Studio 75 once again.  I cannot resist these
 papers with their bright & happy colours!!  


I love to decorate these books & keep them for gifts - something easy & always useful!
On the back of the book I simply painted with gesso & applied some mists by flicking
them on using the uptake straws from the bottles.  It's really easy & fun too!!


Here's a close up of the details. The new Splash it! Collection teaches you how to 
be brave using mixed media because the papers already have some splashes to 
encourage you!  For this I used only the 7 x 12 inch sheet Splash it! 05 sheet 
with words.  I cut them all out & created a collage which I then framed within
a piece of chipboard.  Paper Used:-  Splash it! 05 7 x 12 inch paper

Splash it 05

Don't forget to join us in our new Bingo Challenge from Dawid HERE.
There are still 13 DAYS TO PLAY!! I would love to see you play along!!